 |
| The raw materials |
You can bet that kicked my bootie into high gear.
Not that I didn't agree that our "system" wasn't much of a system-- it was a series of expanding file boxes we got at various Ikea visits; so they didn't match and were not integrated... and there was duplication all over the place. But with the threat of ugly entering the house, I set out to find a better solution--err, compromise. I had found a "filing ottoman" at the Dormy House, but at a whopping £500, I wasn't about to spend that kind of cash. I mean-- what is it? Some plywood, some fabric-- how hard could it be? So an idea was born. And thankfully with a handy husband, it was also relatively painless.
It took MRN all of 15 minutes to build it (thanks to the cutting service at B&Q-- England's equivalent to Home Depot). Then the fun part of upholstering. Which wasn't fun at all-- what started as my project ended with me throwing my hands up and letting MRN take over (he can't help it... I'm the queen of get the project finished in the least amount of time and he's Mr. Detail get everything perfect when it comes to building anything). Our take-away? I'm the "idea man" and he's the "execution man." Fine by me!
Here's a step-by-step of our DIY filing ottoman. Still some finishing work (in terms of lining the inside), but functional and in use for the time being. MRN thinks we should sell them-- much better option than ugly metal filing cabinets, don't you think?
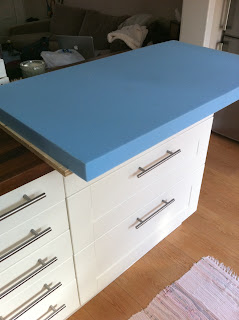
The goods:
- Plywood
- Foam
- Quilt batting
- 3 yards of striped fabric
- Spray adhesive
- Staple gun
- Furniture legs
- Hinges
- Metal dowels
- Cardboard
- Satin ribbon
- Upholstery nails


A notice board/decorative touch on the inside cover made from thick poster board which I covered with the same fabric, satin ribbon and upholstery nails. The ribbon is a pretty close match to the color of the flowers in the wallpaper used to decorate Gladys (and the lampshade). Lucky purchase on my part considering I didn't bring a swatch to the fabric store. Whoop!


3 comments:
testing... 1-2-3... testing
Incredibly clever. I want one.
We'll make you one, aunty mikie!! just need to spend enough time in no. ca! :) we figured that we could always move this into our living room as a coffee table/footstool (if we ever have one big enough where it will fit), or take out the files and use it as a toy box (if we ever have children). :)
Post a Comment